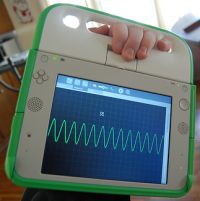
I've been getting increasing numbers of requests from donors in the first OLPC Give 1 Get 1, many of whom are just getting around to opening their XOs, to have their laptops repaired.
As is now widely known, due to a manufacturing glitch the first few batches of OLPC XO-1s that were shipped to consumers had a faulty motherboard battery holder. This alone wouldn't be a problem, if only two other things hadn't happened at the same time:
- The XO-1s were shipped with Open Firmware's security enabled. This caused them to have the same anti-theft protection as laptops deployed in the third world, without any of the benefits of a remote killswitch or tracking
- The XO-1s had a version of OFW which would fail to boot when the clock was below a certain value
The above two issues combined with the manufacturing fault was a recipe for disaster. Owners who discovered this in the first 30 days were able to get a RMA and a working laptop, but OLPC lacked the resources to support those outside of this minimal warranty.
I've been running an OLPC repair center, OLPC DC Repair, (charging only minimal fees for labor and shipping) since mid-2008, and have handled dozens of these "unbricking" problems.
The procedure for repairing the above is straightforward and well documented. However, it can be tedious, especially for those who are unfamiliar with the tools involved. Since I needed the programming practice anyway, I decided to write a rudimentary Python script to automate the process.
Thus enters d6.py
d6.py makes it (hopefully) amazingly simple to unbrick your XO, so that you can get up and running as soon as possible. You can clone the git repo, or download it directly (permalink).
To download and run in a single command:
python -c "import urllib2; exec urllib2.urlopen
('http://dev.laptop.org/git/activities/olpc-contrib/tree/d6.py').read();
Plug in your OLPC Serial Adapter (or one of the compatible alternatives), and run the script as a user which has access to /dev/ttyUSB0 (or as root, not recommended) or change the path inside the script to something suitable to your system.
This script is in the alpha state, is poorly documented, and may not handle all edge cases (read: other people's systems) well. I'm not responsible if it kills your cat, lights your XO on fire, or makes your wife leave you, but hopefully it'll be of some use. Expect a GUI shortly.
Limitations:
- Does not handle all error conditions
- No command line params
- Hard-coded path to serial adapter
Therefore, the code does not run on other platforms other than Linux. You might also encounter problems if you're running it on a system with brltty installed, removing it should fix the conflict.
Feedback is more than welcome in the comments. If you don't have an OLPC-compatible serial adapter, or have other hardware problems with your XO, you can contact the OLPC DC Repair center, which serves the US and Canada
Luke Faraone is an OLPC volunteer and has graciously allowed us to republished "Fix bricked XOs automatically" here with his permission.


@Wayan,
The title should be "Automatically", you forgot the terminal "a".
I've seen this comment before:
"The XO-1s had a version of OFW which would fail to boot when the clock was below a certain value."
Does this mean that you can leave the XO for a while, the clock will increase in value, and the XO will boot ? This was suggested early after the problem was discovered, but I have never heard if it is a solution. Certainly would be an easy fix for a user in the field, if they can wait a few weeks.
Note that the LED lights can help identify this problem. If the amber battery light flashes when the power module is plugged in ( battery removed) and the green power LED does not light when the power button is pressed, then suspect this problem. If the green power LED does light, suspect the software.
@Dinky, Uh, that diagnostic criteria does not match what OLPC says, and what I've seen in the field.
From http://wiki.laptop.org/go/Fix_Clock:
Symptom 1: "The power LED turns on, but the screen never turns on (not even the backlight). The microphone LED may flash briefly, but stays off. "
My reference point is:
http://wiki.laptop.org/go/XO_Troubleshooting_PowerOn
I have fixed XO's with green power on LED and no display by clean install.
Hence, a green LED and no display is not always the RTC clock problem.
Web posts seem to point to two types of failures, no green power LED and green LED with no display.
My point was to try the clean install first if there is a green power LED.
The amber LED flash indicates that the motherboard is not dead and that the Embedded Controller is functioning.
I will defer to your experience with a greater number of XO repairs. I have an XO coming with just the amber flash - will see what is required to get it running.
Any comment on the "wait" approach ?
My apologies if that page isn't clear. If the battery light doesn't show any activity at all when the battery is present and the OLPC XO is plugged in, there are three conditions:
* The XO EC needs to be reset, which involves removing all power for 60 seconds and then reapplying power
* The XO EC is borked, which requires replacement. (prohibitively expensive, replacing the whole mobo is cheaper)
* The XO LEDs are broken. This is unlikely.
With the brick I described in my post, the EC powers on, the power light and battery light turn on, but the screen does not.
I'll work with the OLPC Support Gang to refactor that page into something more easily understood.
Theoretically it would take 31 days for the clock to revert to a state in which the laptop would boot after power-on, since the bug was with regards to how the OFW handles "0" in the month field. In practice, I have never heard of this working, nor have the engineers I asked at OLPC.
After downloading and setting up to run, d6.py fixed up a 'bricked' XO in very short order. Clever solution, essential for repairs!
Luke,
A couple of questions. I've got a couple of "bricked" OLPCs, I think. Helpful Iain in Bellingham taught me how to take apart the OLPC. I have ordered this serial adapter: 895-EVAL232R FTDI Interface Modules & Development Tools USB to RS232 Dev Brd from Mouser.com.
However, Mouser folks could not help me with the cables. What do I need to connect the serial adapter to my Toshiba (Windows 7) laptop? I'm assuming one cable can be just my laptop to print server one (wireless printing), but what about the one that plugs into the J1 connector dealy-bobber? (I feel like one of those people on CarTalk who never know how to describe their failng auto parts!).
I also read your "software solution" about ten times (d6.py). Does my laptop have to be Linux to make that work?
I want to learn this, because I don't think it's beyond me, and when you've got a bunch of kids just waiting to get one, you want to do all you can.
Thanks in advance for even reading this!
Maryanne
Here is the starting reference:
http://en.forum.laptop.org/viewtopic.php?f=2&t=430&p=533274#p533274
The references therein contain the Molex part numbers for the connector which are available from DigiKey.
I got my USB to serial breakout board from one the references therein (sparkfun.com). The drivers are downloadable from their site. The drivers are available for PC, Mac, and Linux. Your interface from Mouser may use the same chip and same drivers. My breakout board has just one chip and a few passive components.
My connector was constructed from metal foil tape on a piece of plastic that fit snugly under the pins of the connector. The plastic was from pastry packaging and placed metal foil tape (copper or aluminum from Lowes)on it . Cut foil with Xacto knife to form 4 leads and soldered wires to leads. As a precaution, I lacquer coated to keep everything in place (removed lacquer from ends). Check for full electrical separation of foil leads. Taped the connector in place while using it so as to keep it from moving around. ---- my solution
>However, Mouser folks could not help me with the cables. What do I need to connect the serial adapter to my Toshiba (Windows 7) laptop? I'm assuming one cable can be just my laptop to print server one (wireless printing)
Sure. Any "USB A - USB B" cable should work.
>but what about the one that plugs into the J1 connector dealy-bobber? (I feel like one of those people on CarTalk who never know how to describe their failng auto parts!).
Not terribly sure. I'd defer to Dinky's post above, or http://wiki.laptop.org/go/Serial_adapters#Third_Party_Adapters
> I also read your "software solution" about ten times (d6.py). Does my laptop have to be Linux to make that work?
I've not tested it on Windows, but it should work if you change the string '/dev/ttyUSB0' to the path or device number of your serial device.
In my case, using the sparkfun board, it is a USB at computer to MicroUSB on board (available from sparkfun). (This is the cable used to connect many cameras to a computer.)
A ribbon cable was soldered on the board at its solder pads and running to the makeshift plug on the other end (substituted for the correct Molex plug [using sockets] mentioned above). The serial connector on the XO is a Molex recepticle [using pins] which receives the plug. My makeshift plug was wedged between the XO circuit board and the pins in the recepticle.
Hopefully the Mouser kit will contain the cable from the computer to its board. From there, it will be a custom made (by you) cable with the connectors matching the board and the XO.
Note that Luke's program is a Python script and requires Python on the computer (PC or linux). Another XO can be used to run the script. A script makes it easy, but a simple terminal (function) can also be use (with the downloaded drivers) to issue individual commands out the computer to the XO.
Hope this clarifies the connections needed.
An interesting point about the RTC clock battery -- it is a rechargeable battery. It is recharged ONLY when the XO is powered on -- does not charge with just battery / AC power module plugged in.
Hence, try leaving the power on for a couple of hours to charge and then retry booting. This will still not help with the buggy firmware or battery coming out of its holder. The battery voltage is about 3.00 volts full charge, and drops to about 2.70 volts for most of its discharge cycle.
CAUTION: some of the battery holders are too tight or the glue is too weak and if you try to remove the battery, you will rip the holder off the circuit board. If the battery must be removed, use a small screwdriver between the battery and the holder and gentlely twist the screwdriver to loosen the battery while keeping the holder firmly against the circuit board.
The opposite case may also be true with some holders - the holder is so loose that the battery may be easily jarred out of the holder. The battery has to be glued in its holder.
Update: There have been two useful posts since the last post here.
Waiting 31 days will never work:
http://en.forum.laptop.org/viewtopic.php?f=1324&t=176983#p616863
Detailed steps for using XO as terminal and sparkfun breakout board BOB-00718 with null modem cable to bricked XO. Drivers are already in the XO linux kernel:
http://en.forum.laptop.org/viewtopic.php?f=1324&t=180103#p616883